A sitemap acts as a helpful map, guiding Google bots to every nook and cranny of your WordPress website.
Submitting a well-formatted sitemap in the Google Search Console (GSC) ensures all your important pages are discoverable and indexed, boosting your website’s visibility.
It is an essential step to ensuring that your WordPress website is properly indexed by search engines, especially Google Search.
You need to:
- Create your sitemap
- Upload it to your GSC dashboard.
Here’s a step-by-step guide to help you create a sitemap and submit it to GSC.
1. Create your sitemap
Two main routes lead to sitemap creation: plugins and manual coding.
Plugins offer the easiest path, while manual coding provides more control.
Option 1: SEO Plugin (for Beginners)

- Log in to your WordPress admin panel. In the left-hand menu, go to “Plugins” and click on “Add New.”
- Choose an SEO plugin; a common example is Yoast SEO.
- Search “Yoast SEO,” click “Install Now,” and then activate the plugin.
- Go to “Yoast SEO” in the left-hand menu and select “General.”
- Click on the “Features” tab and ensure that the “XML Sitemaps” feature is enabled. If you’re using another plugin, navigate to the plugin settings and configure the sitemap options accordingly.
- After configuring the plugin, it will automatically generate a sitemap for your website. The sitemap URL is typically in the following format: https://yourdomain.com/sitemap.xml.
- Open a web browser and enter your sitemap URL. Ensure that it displays a structured list of your website’s pages, posts, and other relevant content.
Option 2: Manual coding (for Pros)
- The GSC requires sitemaps to be formatted in XML. You can find the official specifications on the GSC website.
- Use a text editor to create an XML file that lists your website’s URLs in the proper format. Include information like the URL, last modified date, and change frequency for each page.
- Upload the XML file to the root directory of your website. The sitemap URL is typically in the following format: https://yourdomain.com/sitemap.xml.
2: Submit your sitemap
- Go to the GSC website and sign in with your Google account.
- Click on “Add Property” and enter your website URL. Follow the prompts to verify ownership through a recommended method (HTML file upload, HTML tag, DNS record, or Google Analytics).
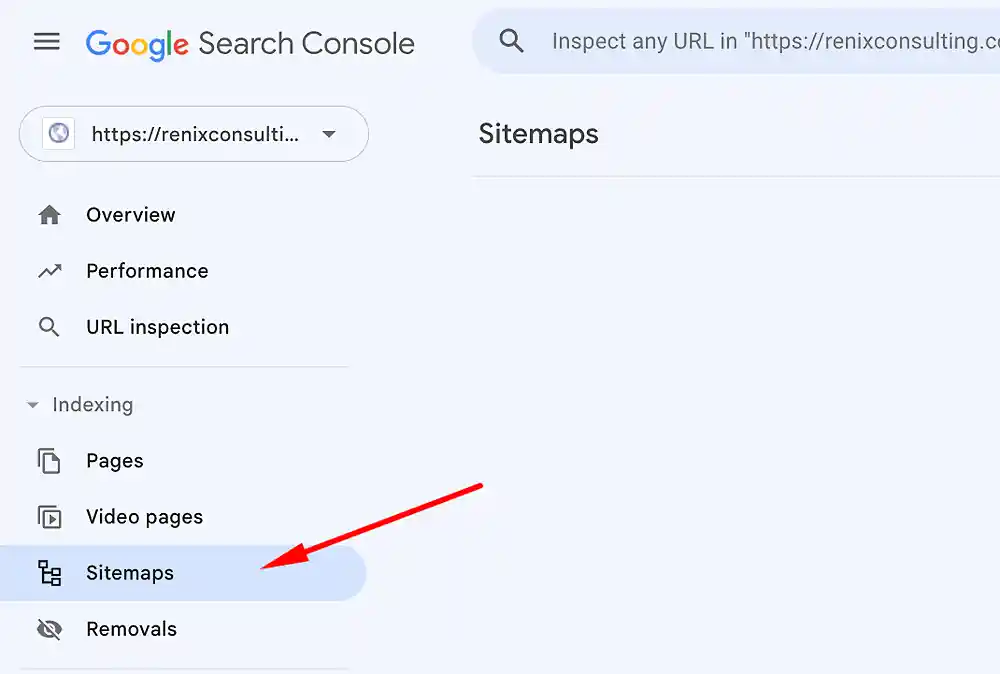
- Once your website is verified, select the property (your website) in the GSC.
- In the left-hand menu, click on “Sitemaps.” In the “Add a new sitemap” box, enter the last part of your sitemap URL (e.g., sitemap.xml) and click “Submit.”
- The GSC will display the submitted sitemap. Verify that it shows the correct number of submitted and indexed pages over time.
- Regularly visit the “Coverage” and “Index” sections in GSC to check for any errors or issues related to your sitemap.
- If you make significant changes to your website or add new content, update your sitemap and resubmit it to GSC.
Did you enjoy this post?
If so, please share it with your friends and followers on social media! It's a great way to help others learn about WordPress and to support our blog. You can use the share buttons below...
Tutorials on YouTube
And if you’re looking for more in-depth WordPress tutorials,be sure to subscribe to our YouTube channel! We have a wide variety of videos on WordPress.