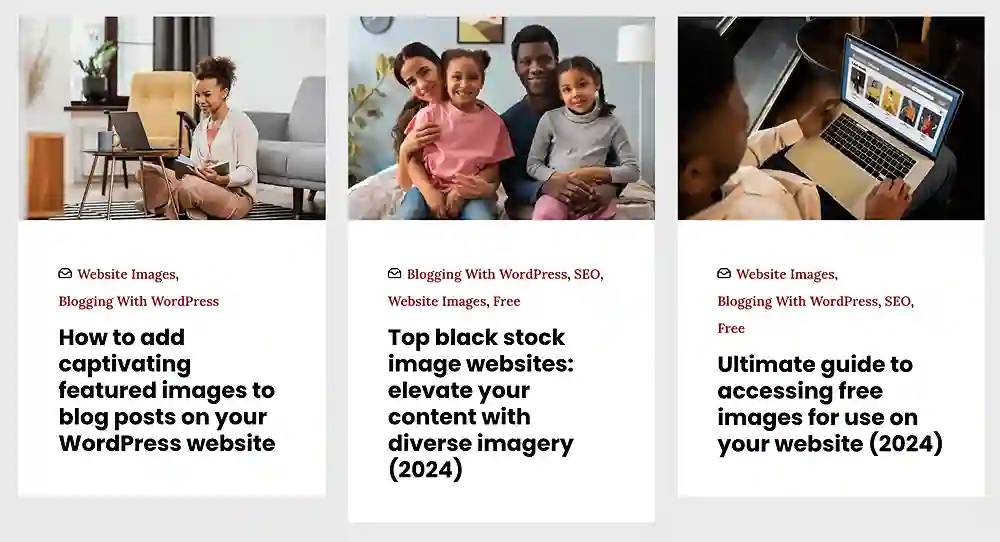
When visitors land on one of your website blog posts, the featured image is the visual gateway to your written masterpiece.
The lure entices readers to delve into your carefully crafted words.
In this blog post, we’ll explore the significance of featured images for blog posts on websites and share tips on choosing and optimizing these visual ambassadors.
The role of featured images
- Capturing user attention: A featured image is the first visual element visitors encounter when scrolling through your blog or sharing your post on social media. It serves as a captivating thumbnail, enticing readers to click and explore.
- Building brand identity: Consistent use of featured images that align with your brand’s visual identity helps establish a recognizable and cohesive online presence. Consider factors like color schemes, styles, and themes that resonate with your brand.
- Social media engagement: featured images are shared with blog posts when they are shared on social media. A well-chosen, attractive image increases engagement with the post, boosting traffic to your website.
Guidelines for choosing a featured image
1. Image sources matter
Always use images that you have the right to use.
This means either taking your photos, using royalty-free images, or purchasing licenses for specific visuals.
Copyright infringement is a serious matter, so tread carefully.
2. Relevance is key
Choose an image that directly relates to your blog post’s topic.
Avoid generic visuals that could apply to any article.
The closer the connection, the more likely you are to pique the reader’s interest.
For example, if your post is about baking the perfect chocolate chip cookie, showcase a mouthwatering image of fresh-baked cookies, not just a stock photo of a kitchen.
3. Visual impact matters
A blurry, pixelated image won’t do you any favors.
Opt for high-resolution visuals that are clear and sharp.
Remember, you want to stop readers in their tracks, not leave them squinting at the screen.
4. Composition counts
Think about the composition of your image.
Is it visually balanced?
Does it draw the eye to the most important element?
Experiment with different angles and crops to find the sweet spot.
5. Tools of the trade
Several online tools can help you create stunning featured images, even if you’re not a design guru.
Canva, PicMonkey, and Adobe Spark are all great options for adding text, overlays, and other design elements to your visuals.
6. Use your brand elements
Incorporate your brand elements into your featured image.
This could be your logo, color palette, or even a signature font.
Subtly weaving your brand identity into the visual will create a cohesive and recognizable look for your blog.
7. Customization options
Take advantage of WordPress’s built-in customization options for featured images.
You can adjust the image alignment and size, and you can even add captions directly from the post editor.
8. Responsive design
Ensure that your chosen featured images are compatible with responsive design.
They should look great and maintain their impact across various devices, from desktops to smartphones.
With more people than ever consuming content on their smartphones, make sure your featured image looks great on smaller screens.
Avoid overly complex visuals or tiny text that becomes unreadable on mobile devices.
9. Keep it fresh
Avoid using the same featured image for multiple blog posts.
It may not only seem repetitive but also fail to capture the unique essence of each article.
Keep your visual library diverse and engaging to maintain reader interest.
10. Optimize for search engines
Remember, your featured image can also impact your search engine ranking.
Use relevant keywords in the image file name and alt text to help search engines understand what your post is about.
This not only improves the accessibility of your content but also contributes to better search engine optimization (SEO).
The perfect size for featured images
According to WordPress, there is no one-size-fits-all answer to the question of the perfect size for featured images.
Your website’s featured image may not look the same as one on another person’s website.
This is mainly because different themes employ various layout widths, meaning that every theme could have a unique size that fits in perfectly with its layout.
Also, social networking platforms have their own “ideal image size,” so if you plan to share your posts there, keep in mind that none of them will likely work well with the others.
Here are some WordPress-recommended featured image sizes…
- 1920×1080: This is the largest image size WordPress recommends, and it works for most themes and social media sites.
- 1200×630: This size works best for the majority of classic WordPress themes and for sharing on Facebook.
- 1024×512: This size should be considered if you primarily share your website posts and pages on X (formerly Twitter).
Regardless of the size you select, attempt to maintain the image’s primary focus close to the center, with as much room as possible above, below, and to the sides of it.
This is important because, while in use, most website themes and social media platforms crop the edges of images, leaving the center of the image displayed.
This way, you won’t have to worry about a significant portion of your image being cropped off
Steps to setting a featured image
Before heading to WordPress, ensure you have the image you want to use as your featured image.
Remember, it should be relevant to your post’s topic, visually impactful, and high-resolution.
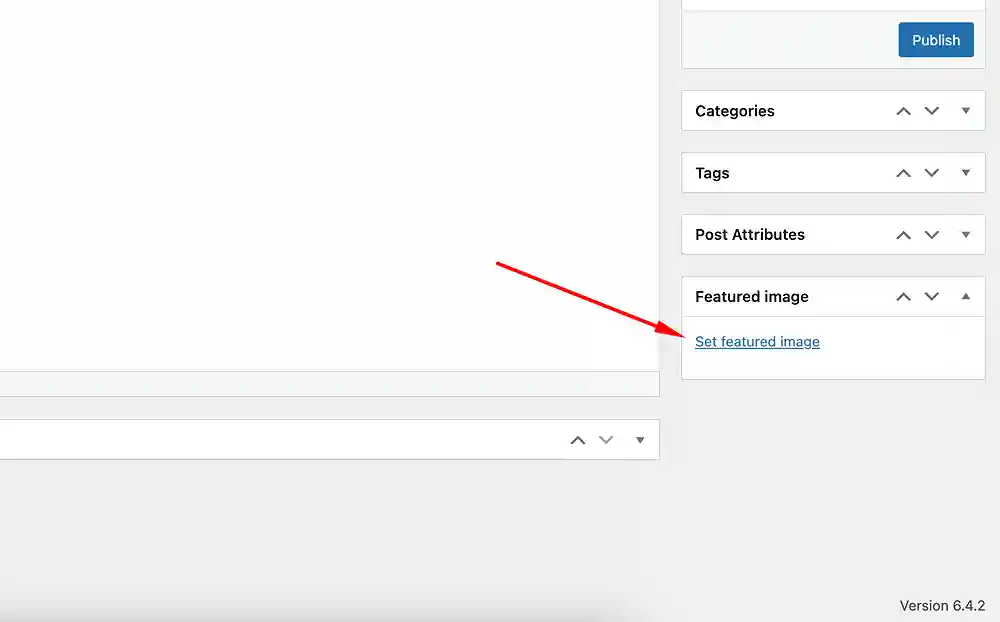
- Log in to your WordPress dashboard and navigate to the “Posts” section.
- Click on the specific post you want to add a featured image to.
- On the right side of your post editor screen, scroll down until you see the “Featured Image” panel. You’ll see a placeholder with the option to “Set featured image.”
- Click on “Set featured image” to reveal two options:
- Upload: Select this if you haven’t already uploaded the image to your WordPress media library. Click on “Select files” and choose your image from your computer. Once uploaded, you’ll see it appear in the preview window.
- Media Library: Choose this if you’ve already uploaded the image to your WordPress media library. If you opted for the “Media Library,” browse through your uploaded images and click on the one you want to use as your featured image.
- Once you’ve chosen your image, you can use the editing tools to adjust its position, zoom in, or crop it to fit your desired view within the post.
- Click on the “Set featured image” button to confirm your selection.
- Before hitting publish, click on the “Preview” button to see how your post looks with the chosen featured image.
- If you’re happy with everything, click on “Publish” to make your post live with its captivating new visual companion.
Did you enjoy this post?
If so, please share it with your friends and followers on social media! It's a great way to help others learn about WordPress and to support our blog. You can use the share buttons below...
Tutorials on YouTube
And if you’re looking for more in-depth WordPress tutorials,be sure to subscribe to our YouTube channel! We have a wide variety of videos on WordPress.