Imagine scrolling through a website full of high-resolution pictures of mountains, each weighing in at several megabytes.
Your browser would groan, the loading bar would crawl, and your patience would wear thin.
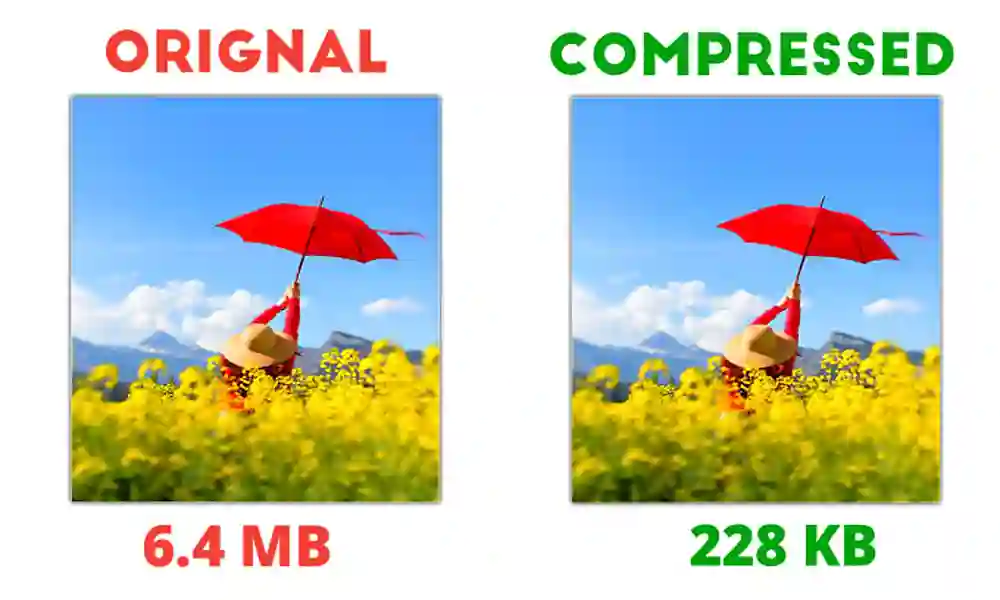
Resizing images shrink their file size dramatically without sacrificing visual quality.
Whether you’re a blogger, a website owner, or a social media enthusiast, optimizing your images is essential for a seamless online experience.
Images are the visual storytellers of your website, playing a crucial role in engaging visitors and conveying your message effectively.
However, using images in their raw, unoptimized form can impact your website’s performance.
In this blog post, we’ll explore the importance of image resizing and guide you through the process using various methods on your WordPress website.
Why image resizing matters
- Faster loading times: smaller images result in a faster page load, which keeps visitors happy and improves your website’s SEO ranking. Large images can slow down your website’s loading speed.
- Enhanced user experience: no more waiting for pixelated giants to download. Resized images ensure a smooth and enjoyable browsing experience for your visitors.
- Improved mobile responsiveness: Properly resized images contribute to a responsive design, ensuring a seamless experience across devices.
- Increased bandwidth savings: Smaller files mean less storage space is used on your hosting plan, potentially saving you money in the long run, unlike oversized images that consume more bandwidth.
Image resizing vs compression
Both techniques aim to make your images lighter and faster to load, but they do it in distinct ways.
You need to resize when you need to fit an image into a specific space and compress when you want to reduce file size without sacrificing too much quality.
Striking the right balance between size and visual appeal is key!
1. Resizing

This is like shrinking a physical photo on a printer.
You adjust the dimensions (width and height) to fit a specific space, like a blog post’s featured image or a thumbnail.
Think of it as changing the frame around the picture.
While the content within (the pixels) remains the same, the overall size of the image file decreases.
2. Compression
This, on the other hand, is like squeezing that same photo into a smaller envelope.
It reduces the overall file size by eliminating redundant data without significantly altering the visual quality.
Imagine meticulously removing unnecessary details from the picture while preserving its essence.
This can involve discarding some pixel information or using clever algorithms to store the image more efficiently.
Guidelines for optimal image resizing
1. Maintain the aspect ratio
Preserve the original image’s aspect ratio to avoid distortion.
Most resizing tools allow you to lock the aspect ratio, ensuring proportional adjustments.
2. Choose the Right Format
Consider the purpose of the image when choosing a file format
JPEG for photographs, PNG for transparency, and WebP for modern compression
3. Optimize for Web
Compress images after resizing to further reduce file size without sacrificing quality.
Use online tools or plugins like Imagify to automate the compression process.
4. Retain Originals
Always keep a backup of the original images before resizing.
This ensures you can revert to the original quality if needed.
5. Test Across Devices
Preview resized images on different devices to ensure they display well on various screen sizes.
6. Consider Image CDN
If you have a high-traffic website, consider using a Content Delivery Network (CDN)
CDN helps efficiently deliver resized images to users worldwide.
Image resizing plugins
How to resize images for your website
1. Using the built-in WordPress image editor

- Log in to your WordPress dashboard. Navigate to “Media” and click on “Add New” to upload your image.
- After uploading, click on the image in the media library.
- Click on the “Edit Image” button or link to access the WordPress image editor.
- In the image editor, locate the “Scale Image” section.
- Enter the desired dimensions or adjust the percentage to resize the image.
- Click the “Scale” button to apply the changes.
- Save the resized image.
2. Using a plugin
- In the WordPress dashboard, go to “Plugins” and click on “Add New.
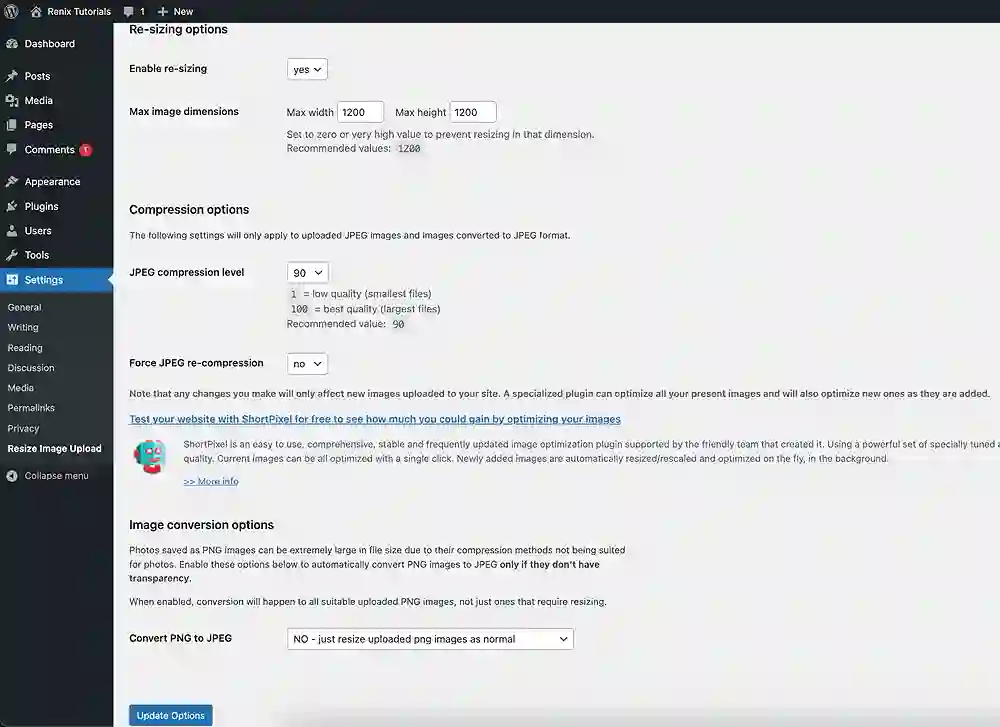
- Search for “Resize Image After Upload,” by ShortPixel, install, and activate the plugin.
- Go to “Settings” and click on “Resize Image Upload.”
- Set the maximum width and height for uploaded images, configure other settings as you desire, and save the changes.
- You can now upload images as usual through the media library, and the plugin will automatically resize images based on your configured settings.
3. Using an online tool (RedKetchup)
- Go to the RedKetchup Image Resizer.
- Click on the “Browse” button and select the image you want to resize.
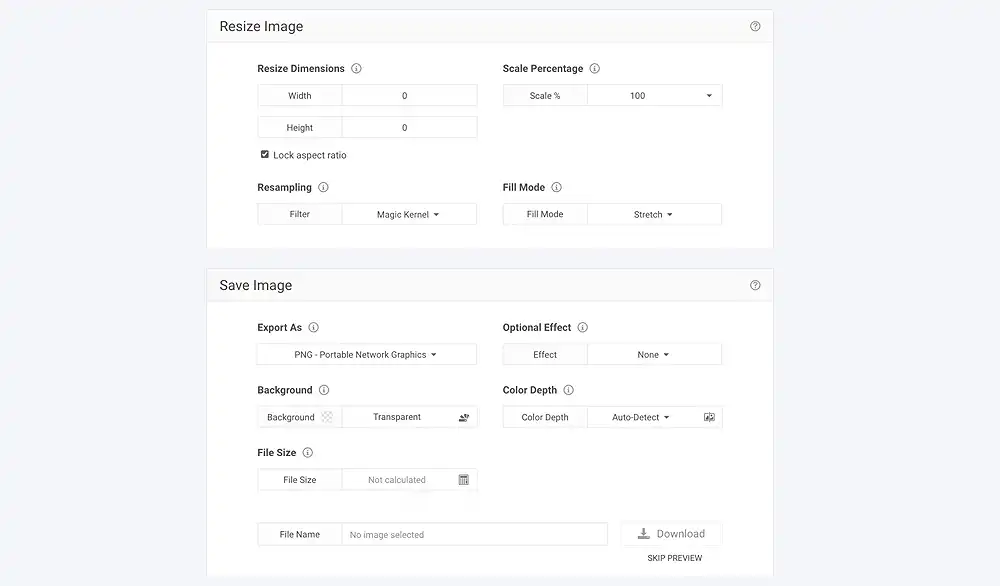
- You will be able to make custom configurations to resize the image, including
- Crop image: a set of tools to rotate, flip, change aspect ratio, and/or crop an image along its dimensions.
- Resize image: tools to resize images using dimensions, percentages, and fill modes.
- In the “Save Image” tab, you can export the image using any of the common image formats and make use of effects, e.g. sharpen, etc.
- When ready, click on the Download button to preview the resized image, and/or click the “Skip Preview” button to skip the preview.
Did you enjoy this post?
If so, please share it with your friends and followers on social media! It's a great way to help others learn about WordPress and to support our blog. You can use the share buttons below...
Tutorials on YouTube
And if you’re looking for more in-depth WordPress tutorials,be sure to subscribe to our YouTube channel! We have a wide variety of videos on WordPress.