Images are essential components that significantly impact a website’s performance and user experience.
The concept of image compression becomes crucial in achieving a delicate balance between vibrant visuals and optimized loading times.
Image compression is the process of reducing the size of an image file without significantly compromising its visual quality.
The primary goal is to minimize the file size, make images more lightweight, and optimize them for web delivery.
This reduction in size translates to faster loading times, decreased bandwidth usage, and improved overall website performance.
In this article, we’ll delve into the world of image compression, understanding its importance, methods, and the transformative impact it can have on your digital content.
Why image compression matters
- Page load speed: Large image files contribute to slower page loading times, leading to a less responsive and engaging user experience.
- Bandwidth conservation: compressed images reduce the amount of data transferred between servers and users, conserving bandwidth and potentially lowering hosting costs.
- Mobile optimization: Optimized images are crucial for responsive design, ensuring a smooth experience across various devices, especially with the increasing number of users accessing websites on mobile devices.
- SEO benefits: Google and other search engines consider page speed as a ranking factor. Faster-loading pages, facilitated by image compression, can positively impact search engine rankings.
Image compression vs resizing
Both techniques aim to make your images lighter and faster to load, but they do it in distinct ways.
You need to resize when you need to fit an image into a specific space and compress when you want to reduce file size without sacrificing too much quality.
Striking the right balance between size and visual appeal is key!
1. Compression
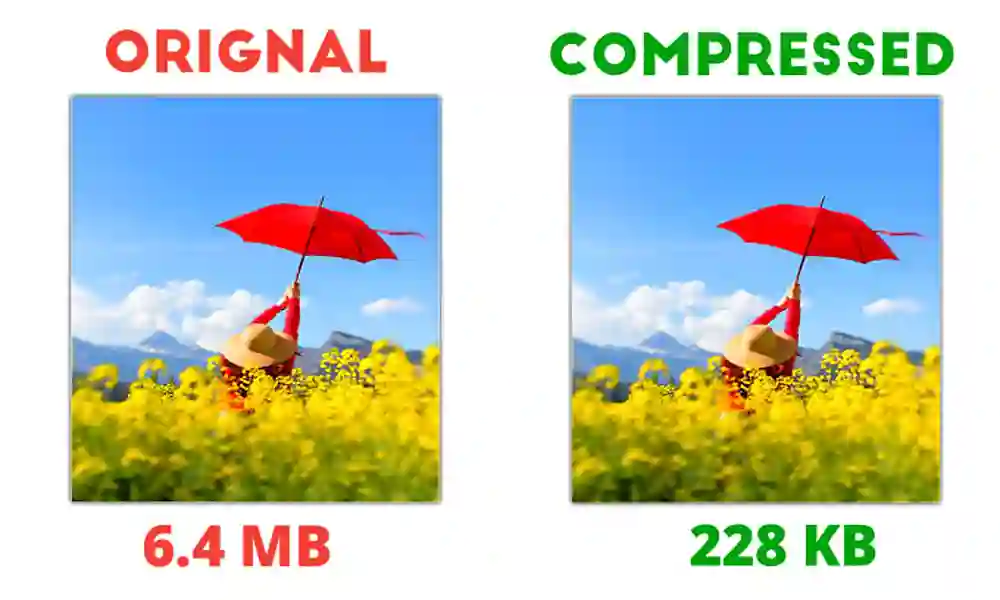
This, on the other hand, is like squeezing that same photo into a smaller envelope.
It reduces the overall file size by eliminating redundant data without significantly altering the visual quality.
Imagine meticulously removing unnecessary details from the picture while preserving its essence.
This can involve discarding some pixel information or using clever algorithms to store the image more efficiently.
2. Resizing
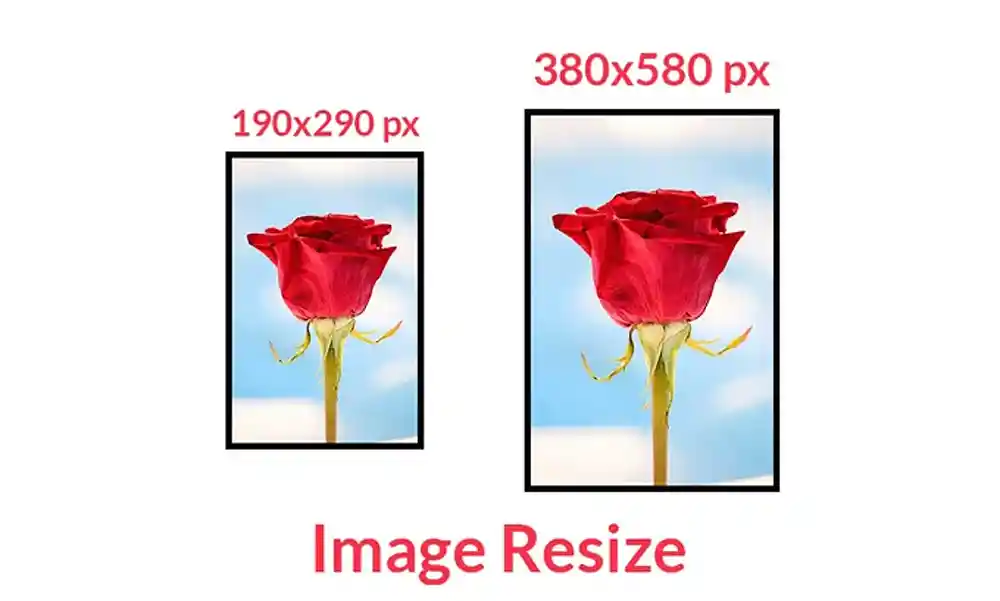
This is like shrinking a physical photo on a printer.
You adjust the dimensions (width and height) to fit a specific space, like a blog post’s featured image or a thumbnail.
Think of it as changing the frame around the picture.
While the content within (the pixels) remains the same, the overall size of the image file decreases.
Methods of image compression
1. Lossy Compression
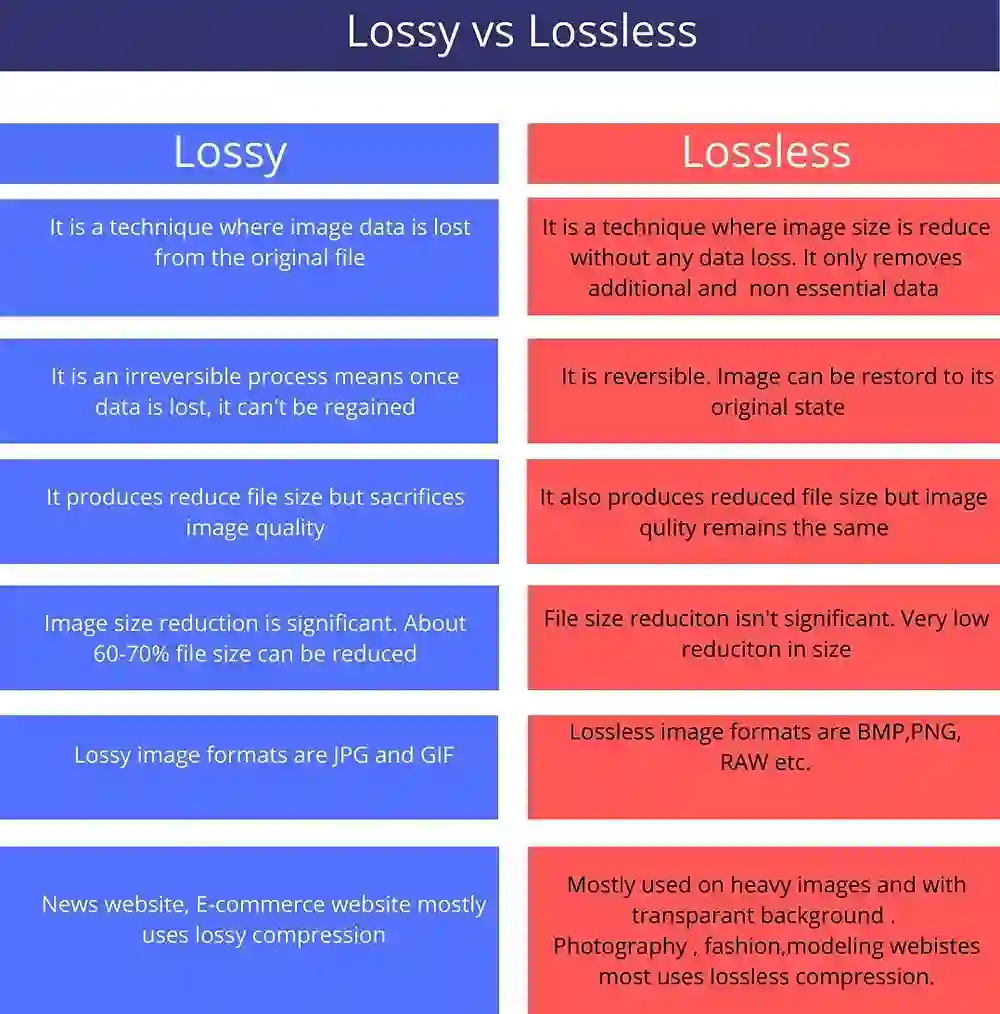
In lossy compression, some data is permanently discarded from the original image to achieve a smaller file size.
While this results in reduced image quality, modern lossy compression algorithms are designed to minimize the perceptual difference, making it challenging to notice the loss in quality to the naked eye.
Common Formats: JPEG (Joint Photographic Experts Group), WebP, and certain settings in PNG.
2. Lossless Compression
Lossless compression retains all the original data, ensuring that no information is permanently discarded.
While lossless compression is preferable for preserving image quality, it may not achieve as high a level of file size reduction as lossy compression.
Common Formats: PNG (Portable Network Graphics), GIF (Graphics Interchange Format), and certain settings in JPEG.
3. WebP Compression
WebP is a modern image format developed by Google.
It aims to provide the best of both worlds: high compression rates with minimal loss in quality.
WebP supports both lossy and lossless compression, making it a versatile choice for web images.
Guidelines for optimal image compression
1. Balance quality and file size
Experiment with compression settings to find the right balance between image quality and file size.
This balance presents the use of small, high-quality images for your projects.
2. Choose the right image format
Select the appropriate image format based on the content.
For photographs, JPEG is often suitable, while transparent images may benefit from PNG.
3. Optimize image size
Resize images to the specific dimensions required on your website.
Avoiding unnecessarily large dimensions.
4. Regularly audit and update
Periodically review and compress images, especially when adding new content.
This will ensure optimal performance over time.
5. Test performance
Routinely assess the impact of image compression on your website’s loading speed.
Use tools like Google PageSpeed Insights or GTmetrix.
6. Backup originals
Before applying compression, always keep a backup of the original images
This introduces flexibility for future edits or changes.
Image compression plugins
How to compress images for your website
1. Using a plugin
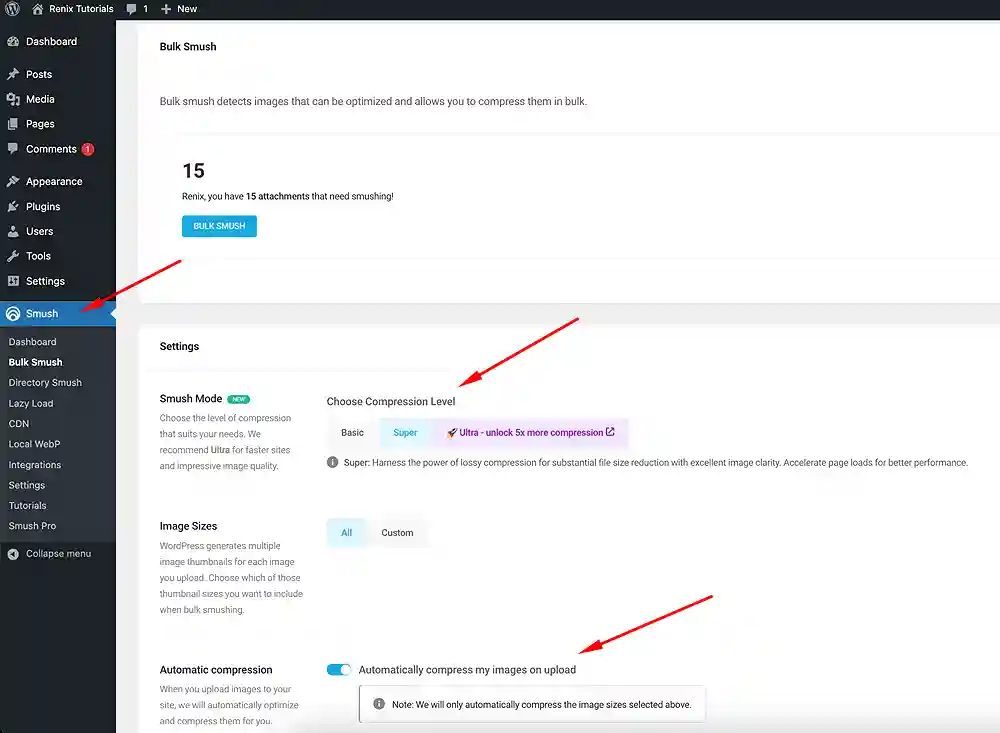
- Log in to your WordPress dashboard. Navigate to “Plugins” and click on “Add New.”
- Search for “Smush” by WPMU DEV, install, and activate the plugin.
- Go to “Smush” on the left-side menu and click on it.
- You may be presented with a set-up wizard to toggle the features as you deem fit. Configure the settings according to your preferences.
- Enable automatic image compression for newly uploaded images.
- Click on “Bulk Smush” to compress existing images in your media library.
- Click “Save Changes” to save your custom settings. Smush will automatically compress images without compromising quality.
2. Using an online tool (RedKetchup.io)
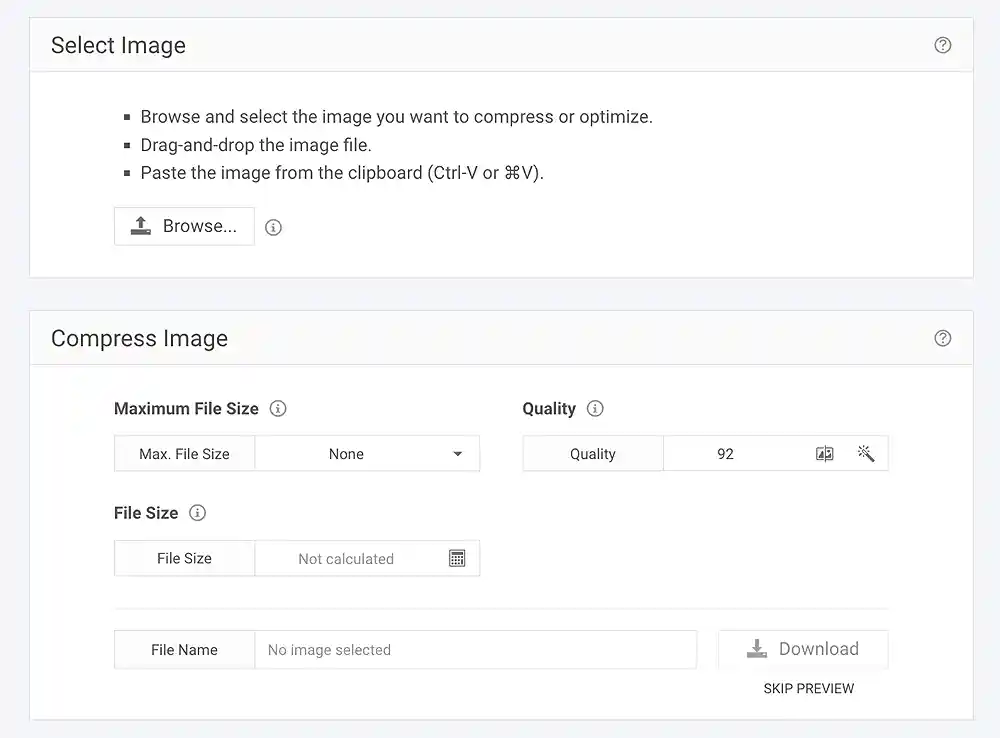
- Visit the RedKetchup Image Compressor.
- Click on the “Browse” button and select the image you want to compress.
- Adjust compression settings, including the maximum file size and quality.
- Click the “Download” button to preview the compressed image or the “SKIP PREVIEW” link to skip the preview.
Did you enjoy this post?
If so, please share it with your friends and followers on social media! It's a great way to help others learn about WordPress and to support our blog. You can use the share buttons below...
Elevate Your Brand with Professional Website Design
Discover how we can transform your online presence with professional website design services. We specialise in creating modern, user-friendly websites tailored for the medical, legal, university, and Christian sectors. If you're ready to elevate your brand and connect with your audience more effectively, contact us today to get started!
Tutorials on YouTube
And if you’re looking for more in-depth WordPress tutorials,be sure to subscribe to our YouTube channel! We have a wide variety of videos on WordPress.
